
Nikon replies that my DSLR needs 3 weeks for repair… well it’s good for me to explore this handy DC & share will all net friends.
For amateurs, I hope you will benefit from it;
For experts, pls. feel free to supplement and make it a fruitful sharing :)
Nikon那邊回復我說,我的數碼單反相機需要3星期去維修……嗯,我想這也是個好機會去好好探究怎麽利用手上這部數碼相機(IXUS 860),同時把自己的經驗與大家分享一下。
如果你是初心者,希望你能透過下面的內容而有所得著。各位攝影高手也不妨多多指正,分享大家的寶貴經驗
雕蟲小技, 見笑了
特別鳴謝机动战士联盟MSL scarecrowhoi兄的翻譯
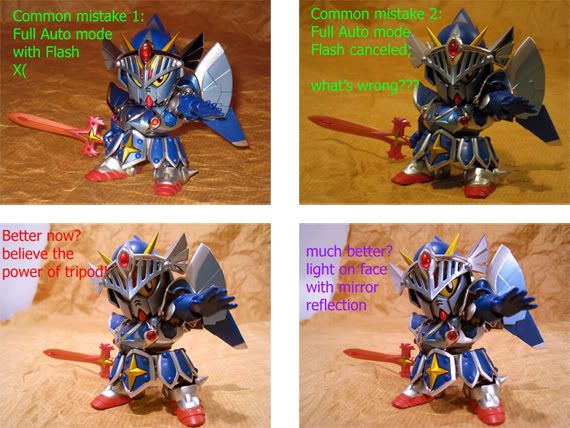
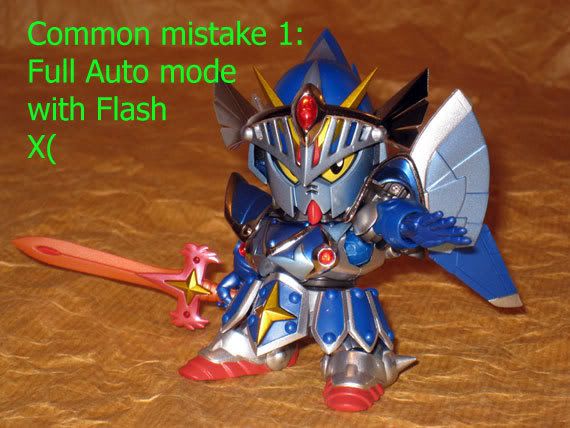
1) Let’s learn from common mistakes…
Mistake 1:
DC’s direct flash is not advised… seeing is believing
1) 從常見問題中學習…
問題一:直接對景物用數碼相機的閃光燈…有圖爲證
Mistake 2:
“Haha, I know to turn my flash off, let’s see...”
And you use full auto mode with hand held… & the below pic is the most typical in toy/model forum…
問題二:"好吧,把閃光燈關掉又如何呢?"
然後你用的是全自動模式,又只用雙手去拿相機,結果就出現了在一般模玩論壇帖子裏面最常見的圖像問題,見下圖…
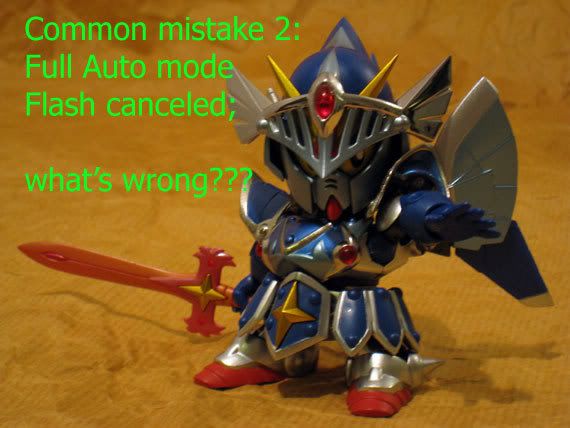
Why!?
The potential problems are:
household lighting is generally not sufficient, hence possible consequences are
a) a fussy pic because of hand shake, or
b) a noisy pic because of high ISO
As I am a hand-shaking guy, 4 years ago tripod is already my most important partner in shooting.
爲什麽會出現問題呢?
潜在的原因,是單靠一般家用的燈光來拍攝通常幷不足够,因此發生了以下問題
a) 因爲手震導致圖片影像過于模糊
b) 因爲調校的感光度過高而導致影像粗糙
因爲自己手震的關係,三脚架在四年之前就已經是我拍攝工作裏最重要的夥伴了。
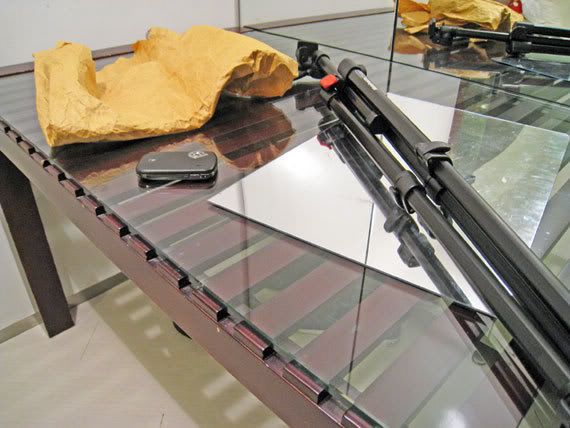
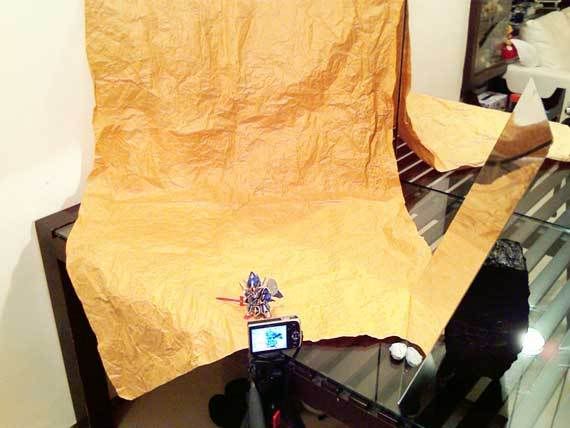
2) Tools:
To take good pics of you collection in economy way, my advice is:
- A DC (of coz)
- Background paper (very important- within $10)- I use wrap paper this time, it is cheap & no need to handle with care
- Tripod (critical!!!- within $70)
“Ap Liu St” stuff is more than enough for little DC, & it is always the gift comes with purchasing your DC - A mirror (I am using an acrylic mirror for safety reason; or a lamp could be a substitute)
想用最經濟的方法去拍攝美圖,我的建議是:
- 一部數碼相機(那還用說~)
- 背景底紙(非常重要,通常十塊錢以下)- 這次我用了牛皮包書紙,又便宜又不怕弄花弄破
- 三脚架 (最關鍵的工具,一般來說70塊以下)‘鴨寮街’級數的工具對于一部小型數碼相機來說已經很够用
了,而購買數碼相機時,三脚架通常也會隨相機附送的。
- 一面鏡子 (爲了安全起見,我用了膠鏡,也可以找一盞可移動的燈作爲代替品)
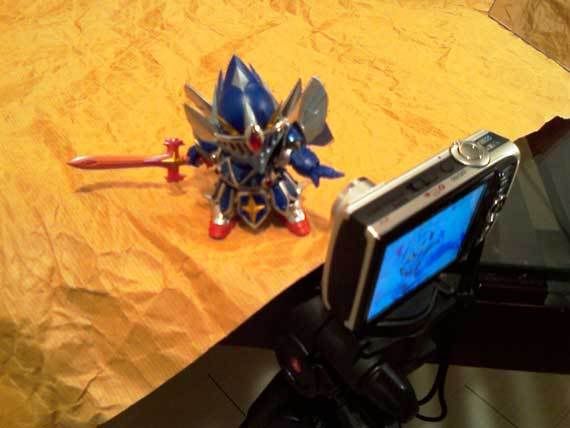
3) The simple trick
3.1 Preferred setting of you DC
- Single point focus (critical! & focus on where you want to focus)
- Lowest ISO
- Macro mode
- disable flash
- Appropriate white balance
3.1 如何調校你的數碼相機
-只對焦于一點上(重點!!還有只對焦于你想表現的焦點上)
-把感光度調校至最低
-使用微距
-不要用閃光燈
-適當的白平衡
3.2 The miracle of tripod!
Not just because it is stable for long exposure time; the most important “side effect” is it makes you more conscious in framing before you press the button! No more casual snaps!
See the effect!!!
3.2
神奇的三脚架!
使用三脚架不只是因爲它可以令相機比較穩定和延長固定時間,最重要的是她能令在你按下快門之前更集中于取景!有了它便不會再有隨便的快拍了,看一下效果:

3.3 The mirror
See the improvement with supplementary lighting from mirror
3.3
使用鏡子
看看使用鏡子作爲輔助光源之後的整體改善...

Comparison:
3.4 Croping & Photoshop trick
Just for fun! Not to mention in detail here la…
3.4
相片剪輯與Photoshop
玩玩而已,這裏就不詳述啦…

3.5 & Finally… The Power of DC
(those with Zero focal length macro)
That exactly DC power surpassing every DSLR with common lens! Explore the possibilities & funs!
Zero focal length!
3.5
最後… 數碼相機的威力
(用上零微距對焦)
這就是DC超越所有用上普通鏡頭的DSLR的真正威力!多找機會探索所有的可能性和樂趣吧!零微距對焦萬歲!
How powerful!!!!!

Again, 雕蟲小技, 見笑了
For expert net-friends, pls. feel free to supplement and make it a fruitful sharing :)
各位攝影高手也不妨多多指正,分享大家的寶貴經驗
沒有留言:
張貼留言